Roof Shingle Repair: Essential Steps for Effective Maintenance and Restoration
Roof shingles protect homes from the elements, but they can suffer damage over time. Timely roof shingle repair not only extends the life of the roof but also prevents more costly issues down the line. Identifying problems early can help homeowners maintain their property and save money on potential repairs.
Understanding the common causes of shingle damage, such as weather, age, or improper installation, is crucial. Regular inspections and maintenance can catch issues before they escalate. Homeowners should know what signs to look for to ensure their shingles are in good condition and to address any necessary repairs promptly.
Repairing roof shingles might seem daunting, but knowing the right techniques can simplify the process. Whether it involves replacing a single shingle or patching leaks, being informed can empower homeowners to take action and safeguard their investment.
Assessing Roof Shingle Damage
Proper assessment of roof shingle damage is essential for effective repair. Identifying the types of damage and determining the extent of repairs required will help in making informed decisions.
Identifying Types of Damage
Several types of damage can occur to roof shingles. Common issues include:
- Cracks and Splits: These can weaken the shingles and lead to water infiltration.
- Curling and Cupping: Usually caused by age or improper installation, this can indicate that shingles are nearing the end of their lifespan.
- Missing Shingles: Strong winds or falling debris can dislodge shingles, creating vulnerable areas.
- Blistering: This occurs from trapped moisture under the shingle surface, leading to peeling or bubbles.
Each type of damage requires a different approach during the repair process. Inspecting closely will provide a clearer picture of necessary actions.
Determining the Scope of Repair
Once damage types are identified, the next step is determining the repair scope. This involves evaluating the severity and impact of the damage. Consider these factors:
- Extent of Damage: A few missing shingles may only require localized repairs. In contrast, widespread curling or blistering may necessitate replacing entire sections.
- Water Damage: If any leaks are present, it’s critical to assess the underlying structure. Mold or rot may need addressing before shingle repairs.
- Age of Roof: Older roofs may make repairs less cost-effective. In some cases, a full replacement might be the better solution.
An overall assessment ensures efficient use of resources while maintaining roof integrity.
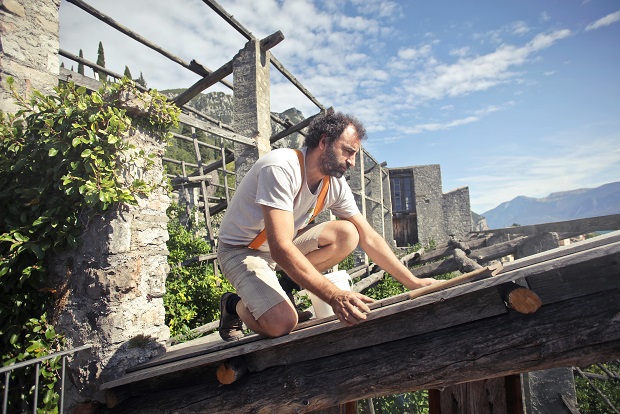
Executing Roof Shingle Repair
Proper execution of roof shingle repair involves careful planning and the right techniques. It is essential to gather the necessary tools and materials before starting the repair process.
Gathering Necessary Tools and Materials
Before beginning any roof repair, collecting the necessary tools and materials is crucial. Here’s a list of required items:
- Tools:
- Hammer
- Roofing nails
- Utility knife or shingle cutter
- Pry bar
- Caulk gun (with roofing cement)
- Ladder
- Materials:
- Replacement shingles
- Roofing felt
- Underlayment, if needed
Having these items at hand ensures a smoother repair process. Check the specific type of shingles used on the roof to match replacements accurately. Safety equipment, such as gloves and goggles, should also be included.
Step-by-Step Repair Process
To repair a damaged section of shingles, follow these steps:
- Assess the Damage: Inspect the roof to determine which shingles need replacing. Look for cracks, missing pieces, or curling edges.
- Remove Damaged Shingles: Use a pry bar to carefully lift and remove broken shingles. Avoid damaging adjacent shingles.
- Prepare the Area: Clear away any debris and ensure the underlayment is intact. If it’s damaged, replace it with new material.
- Install New Shingles: Place a new shingle into position. Nail it securely into place, ensuring it aligns with neighboring shingles.
- Seal Edges: Apply roofing cement under the edges of the new shingle to create a watertight seal.
- Inspect the Repair: Check the installation for any gaps or misalignments before stepping off the ladder.
Finishing and Clean-Up
After completing the repair, focus on the clean-up process. This includes:
- Removing Debris: Collect any leftover materials and dispose of them properly. Keep the working area clear to prevent accidents.
- Inspect the Surrounding Area: Check for any loose nails or pieces of old shingles that could pose a hazard.
- Final Inspection: Conduct a visual check of the entire roof. Ensure that the new shingles sit securely and that no areas remain exposed.
A thorough clean-up helps maintain the integrity of the roof and the safety of those walking underneath it.


Zudio Online Shopping: Discover Affordable Fashion and Lifestyle Products
Zudio online shopping offers a convenient way to access a wide range of fashion products a…

Book Illustration Companies: Creating Visual Narratives for Authors
Book illustration companies play a vital role in the publishing industry, bringing stories to …


